
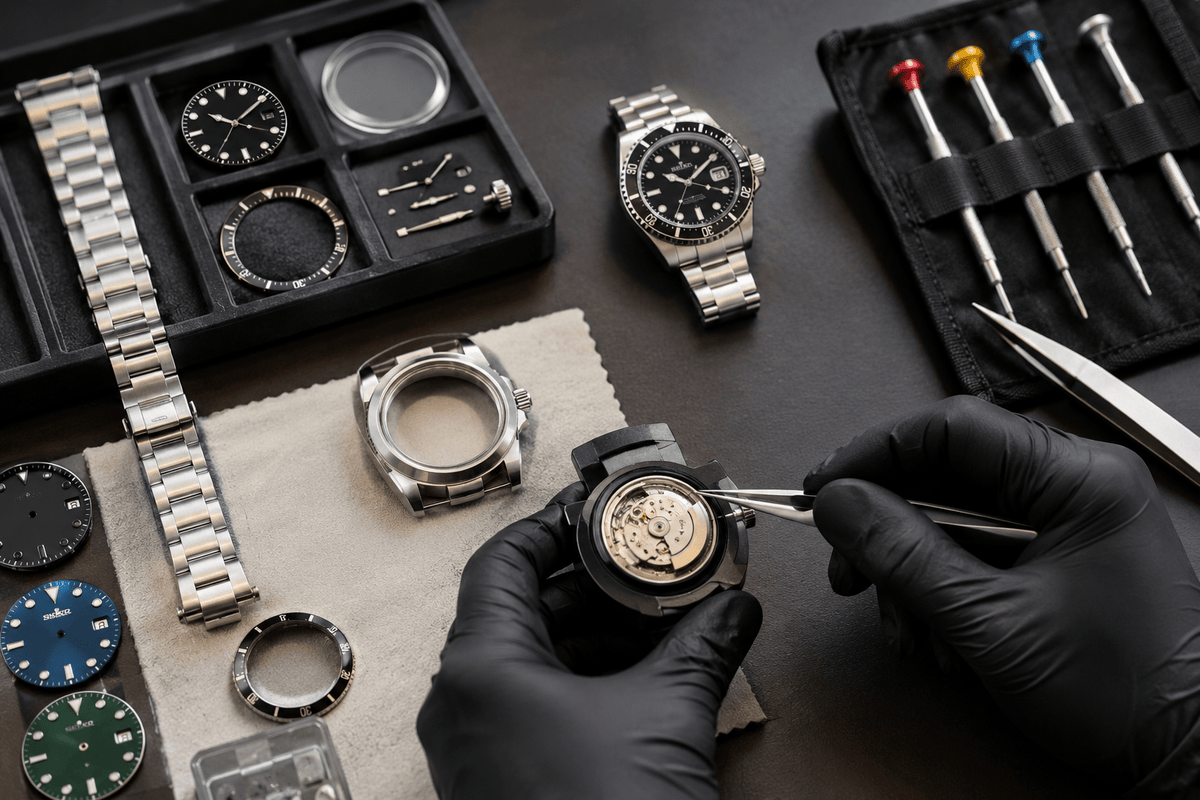
Building a custom watch can be both a creative project and a practical way to learn how mechanical watches work. If you are wondering how to build a Seiko mod, the process starts long before you pick up a screwdriver. Choosing compatible parts, preparing the right tools, and following a careful assembly order can make the difference between a smooth build and a frustrating one.
This Seiko mod tutorial covers the complete process, from selecting the movement and case to fitting the dial, hands, crystal, and bracelet. It also explains key checkpoints that can help DIY enthusiasts avoid common mistakes.
What Is a Seiko Mod?
A Seiko mod is a customised watch assembled using compatible components. These builds can combine different movements, cases, dials, hands, crystals, bezels, and bracelets to create a particular look or specification.
The term does not mean modifying every component of an existing watch. Many enthusiasts instead purchase individual Seiko Mod Parts and assemble them into a complete watch.
The appeal is flexibility. You can choose a classic dive-watch appearance, a minimalist dress style, or a design inspired by high-end watches while selecting the components that suit your preferences.
How to Build a Seiko Mod: Start With the Movement
The movement should normally be your first major decision because it determines compatibility with several other components.
Popular automatic movements used in Seiko-style builds include the NH-series movements. However, compatibility varies between movements and cases, so never assume that two parts will automatically fit together.
Check These Movement Specifications
Before ordering parts, check:
-
Movement diameter
-
Stem position and height
-
Hand compatibility
-
Dial feet position
-
Date-window position
-
Case compatibility
-
Crown and stem arrangement
-
Required movement holder
The movement also influences how the dial and hands need to be installed. Choosing the movement first gives you a reliable foundation for the rest of the build.
Choose a Compatible Case
Once you know which movement you are using, select the case around it.
The case determines much of the final watch's character. It also needs to accommodate the movement, dial, hands, crystal, crown, and bracelet or strap.
Pay close attention to case specifications such as:
-
Movement compatibility
-
Case diameter
-
Lug width
-
Case thickness
-
Crystal diameter
-
Crown position
-
Case-back clearance
-
Bracelet mounting system
A case that looks perfect in photographs may not work with your chosen movement or dial.
When planning custom Seiko mods, treat compatibility as more important than appearance at this stage. A visually attractive combination is not useful if the components cannot be assembled correctly.
Select the Dial and Hands Together
The dial and hands create the visual identity of the watch, but they also have mechanical requirements.
Check that the dial is designed for your movement. The dial feet need to match the movement or be positioned correctly for installation. If the dial has a date window, make sure it aligns with the movement's date mechanism.
Hands also require careful selection. Hour, minute, and seconds hands need to match the movement's hand-post dimensions.
Why Hand Compatibility Matters
A hand that is too loose may not remain securely mounted. A hand that is too tight can create installation problems or potentially damage the movement.
The hands should also have enough clearance from:
-
Each other
-
The dial
-
Applied indices
-
Crystal
-
Chapter ring, where applicable
Choose the Crystal and Bracelet
The crystal is more than a cosmetic component. It needs to match the case and should sit correctly within its intended mounting system.
Depending on the case, you may encounter mineral, sapphire, or other crystal options. Sapphire is often selected by builders who want strong scratch resistance, but the most important consideration during assembly is compatibility.
Measure or confirm the correct crystal specification before purchasing.
The bracelet or strap is usually easier to select once the case is confirmed. Check the lug width and end-link compatibility. If using a bracelet designed for a particular case shape, verify that the end links sit correctly against the case.
Essential Seiko Mod Tools
A careful build requires more than a basic screwdriver. Having suitable Seiko mod tools reduces the risk of scratches, slipping components, and accidental damage.
Useful tools include:
-
Watchmaker screwdrivers
-
Tweezers
-
Hand-setting tools
-
Movement holder
-
Case-back opener
-
Dust blower
-
Finger cots or clean gloves
-
Loupe
-
Rodico or similar cleaning material
-
Spring-bar tool
-
Soft work mat
Keep your workspace clean and well lit. Tiny particles can become surprisingly noticeable under a crystal, while a small screw can disappear quickly on a cluttered desk.
Seiko Mod Assembly: The Recommended Sequence
Following a consistent Seiko mod assembly sequence helps reduce unnecessary handling.
1. Prepare the Movement
Place the movement securely in a movement holder. Keep the workspace free of dust and avoid touching sensitive surfaces unnecessarily.
Confirm that the movement is functioning before proceeding where practical.
2. Install the Dial
Position the dial carefully over the movement and secure it using the correct method for the movement and dial combination.
Check the dial alignment from multiple angles. If the dial is slightly rotated, correcting it now is much easier than after the hands are installed.
3. Set the Hands
Set the hour, minute, and seconds hands carefully using appropriate hand-setting tools.
A common mistake is pressing too hard. Hands should be installed with controlled pressure and should remain level.
After installation, advance the hands through a full cycle where appropriate. Confirm that the hands do not touch one another or the dial.
4. Prepare the Case
Make sure the inside of the case is clean. Use a blower to remove dust rather than wiping internal surfaces with unsuitable materials.
Install any required movement spacer, holder, gasket, or other case-specific components.
5. Place the Movement Into the Case
Carefully position the movement and dial assembly inside the case.
Check the crown and stem alignment before securing the movement. If the crown does not engage correctly, stop and investigate rather than forcing it.
6. Install the Stem and Crown
The stem needs to engage correctly with the movement and crown.
Cutting a stem to the correct length requires patience. A stem that is too long can prevent the crown from seating correctly, while one that is too short may not engage properly.
7. Install the Crystal and Case Components
If the crystal is not already installed, follow the case manufacturer's recommended installation method.
Use the correct press or tool where required. Avoid applying uneven pressure because this can damage the crystal or case.
8. Close the Case
Before closing the case, inspect the dial and crystal for dust. This is one of the last easy opportunities to remove particles.
Check the gasket and case-back seating before securing the case.
9. Attach the Bracelet
Install the bracelet or strap using the correct spring bars.
Check both sides carefully and confirm that the spring bars are fully seated. Give the bracelet a gentle pull before wearing the watch.
Testing Your Finished Build
Completing the assembly does not mean the build is finished.
A proper testing stage should include several basic checks.
| Check | What to Confirm |
|---|---|
| Hand clearance | Hands move without touching |
| Crown | Winding and setting work correctly |
| Date | Date changes as expected |
| Dial alignment | Dial sits straight |
| Crystal | No visible dust underneath |
| Bracelet | Spring bars are secure |
| Case back | Properly seated |
| Movement | Watch runs normally |
For an automatic movement, monitor the watch after assembly rather than judging it from only a few minutes of operation.
If accuracy or water resistance is important, use suitable testing equipment or have the watch checked by a qualified professional. Do not assume a case is water resistant simply because it has a gasket.
Common Seiko Mod Mistakes to Avoid
Even experienced DIY builders can encounter problems. Some of the most common include:
Buying Parts Before Checking Compatibility
A dial, case, and movement may each look suitable but still fail to work together. Always verify specifications before purchasing.
Forcing Components
If a component does not fit with reasonable pressure, stop. Excessive force can damage threads, hands, gaskets, crystals, or movement components.
Touching Surfaces With Bare Fingers
Fingerprints on a dial, crystal, or hands can be difficult to remove later. Handle visible components carefully.
Ignoring Dust
A tiny particle may not be obvious until the crystal is installed. Clean the workspace and inspect the watch before closing the case.
Rushing the Hands
Hand installation requires precision. Take your time and check clearance before completing the build.
Skipping Final Checks
A watch can look complete while still having a loose bracelet, misaligned dial, incorrect crown operation, or hand-clearance issue.
Building a Custom Seiko With Confidence
The easiest way to approach a DIY watch project is to think of it as a compatibility exercise rather than simply putting attractive parts together.
Start with the movement, choose a compatible case, then confirm the dial, hands, crystal, and bracelet. Keep your Seiko Mod Parts organised and follow the same assembly order each time.
For enthusiasts exploring custom Seiko mods, patience is one of the most useful skills. A careful builder is more likely to catch a problem before it becomes expensive or difficult to correct.
Blank Mods can also be a useful starting point for enthusiasts exploring components and ideas for their next custom build.
Final Thoughts
Learning how to build a Seiko mod becomes much easier when the process is broken into clear stages. Movement selection establishes compatibility, while the case, dial, hands, crystal, and bracelet shape the finished design.
The key is not speed. Take time to verify specifications, use suitable tools, keep components clean, and test each stage before moving forward.
A successful build should not only look good. It should also function correctly, with properly aligned components and secure assembly. By following a consistent Seiko mod tutorial sequence, DIY enthusiasts can approach each project with greater confidence and fewer avoidable mistakes.
FAQs
1. What is the first part I should choose when building a Seiko mod?
The movement is a good starting point because its specifications affect compatibility with the case, dial, hands, and other components.
2. What tools do I need to build a Seiko mod?
Basic Seiko mod tools include watchmaker screwdrivers, tweezers, a movement holder, hand-setting tools, a case-back opener, a blower, and a spring-bar tool.
3. Can any Seiko dial work with any movement?
No. Dial feet, movement dimensions, date-window position, and other specifications need to be compatible.
4. How do I know if Seiko mod hands will fit my movement?
Check the hand-post dimensions specified for your movement. Hour, minute, and seconds hands can have different fitting requirements.
5. Why are my watch hands touching each other?
The hands may not be seated at the correct height or may have been installed unevenly. Remove and inspect them carefully rather than forcing them into position.
مشاركة:
شرح قطع تعديل ساعات سيكو: الدليل الكامل للعلب، والموانئ، والعقارب، والإطارات، والزجاج